In this tutorial, you'll learn how to create a fantasy scene of an
autumn fairy. This tutorial will show you how to create hair, makeup,
and apply lighting effects in simple steps to help improve your photo
manipulation skills and techniques.
Tutorial Resources
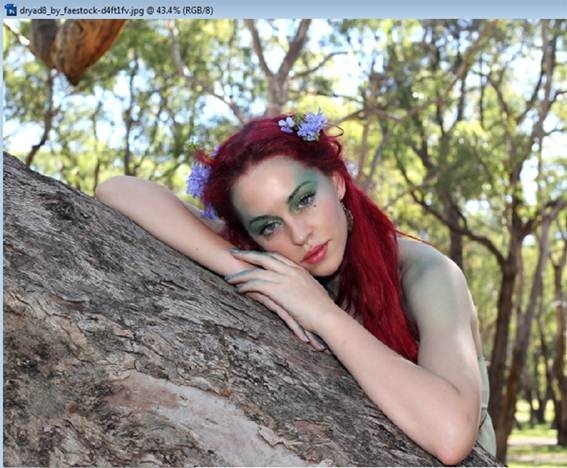
Step 1 – Model
Choose the model.
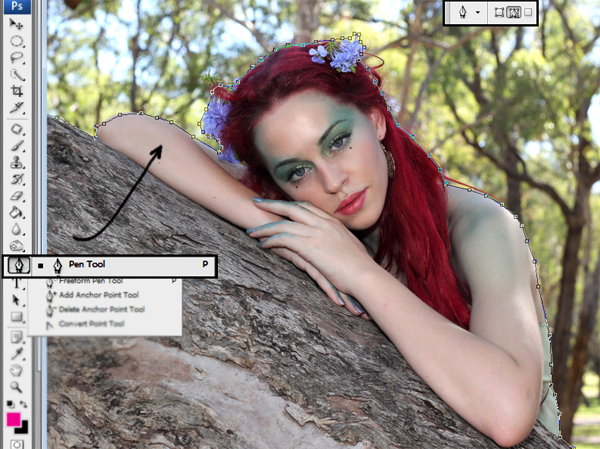
Step 2 – Select the model
Use the Pen Tool to select the model. Make sure the option is in “Paths” like you see in the little box below.
Step 3 – Make the Selection.
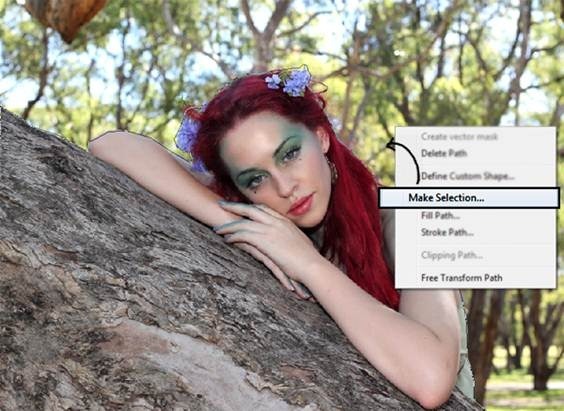
When you end with the selection press right click. Now in the menu you have on the screen choose the option make selection.
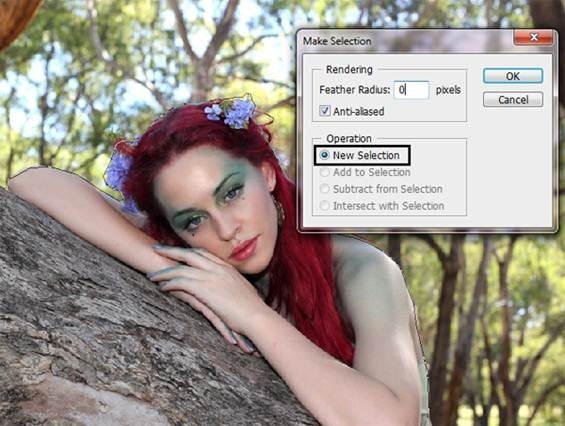
Choose the option New Selection and press ok.
Step 4 – Subtract model from the background
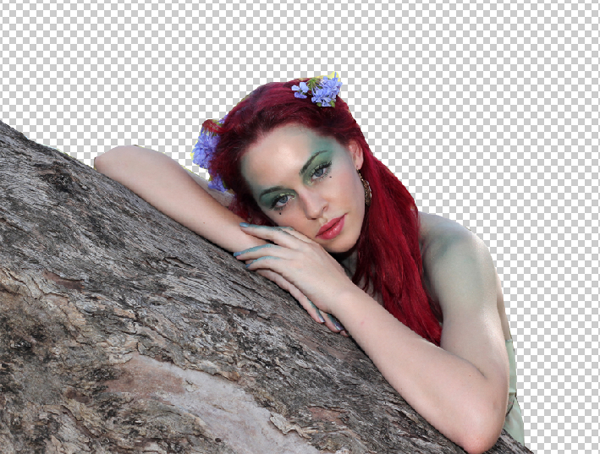
Press Ctrl+J to duplicate the model’s selection you made before. The result has to be like this:
Step 5- Open a new file
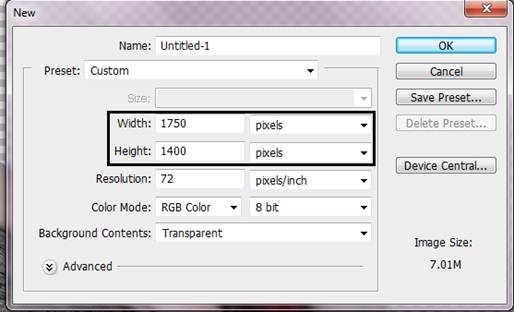
To open a new file go to the menu File – New or press Ctrl+ N. The resolution is Width : 1750 x Height: 1400 pixels.
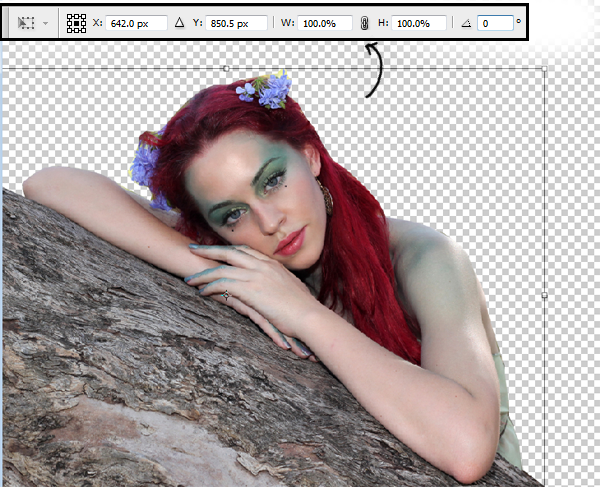
Step 6 – Resize the model.
Now
put the model in the new file and change the size to fit this
resolution. To change the size press Ctrl + T (Free Transform).
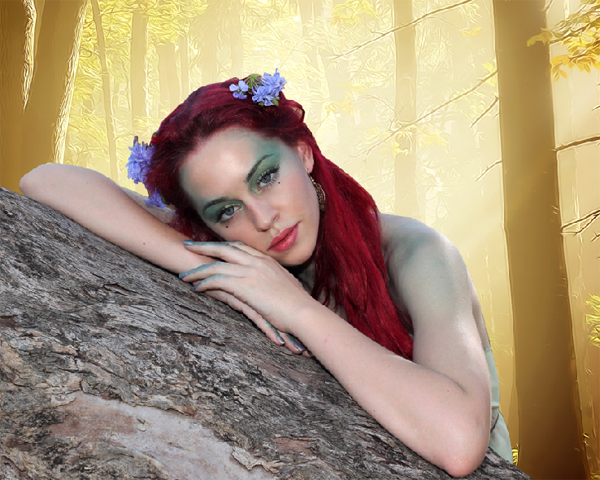
Step 7 – Find a Background
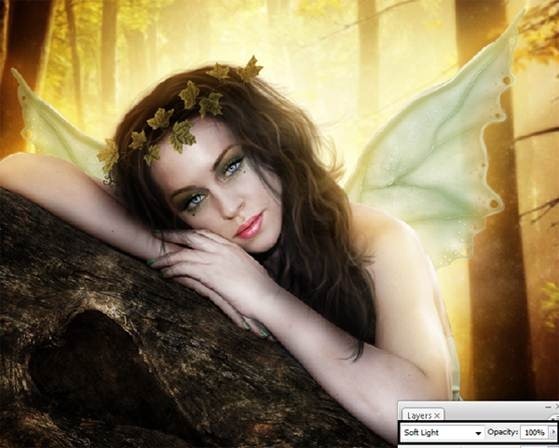
In this case you can use a forest that doesn’t have to many branches, because the main focus is going to be the model.
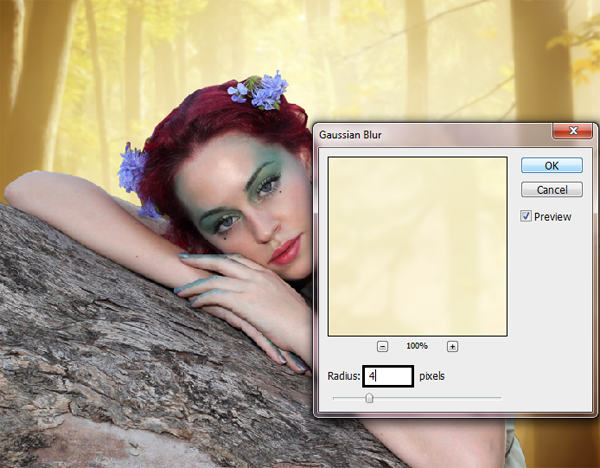
Step 8 – Gaussian Blur.
Apply blur to the background. Go to filter – Blur – Gaussian Blur. Add 4 of radius.
Step 9- Contrast
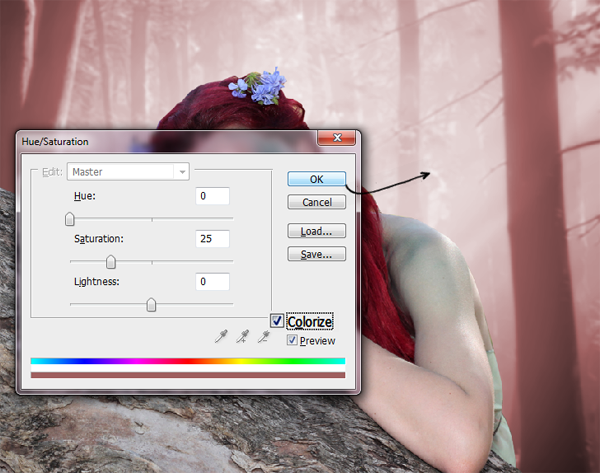
Duplicate
the background layer, press Ctrl + J. and change the layer color, to do
this go to Image – Adjustments – Hue/Saturation or press Ctrl+ U. Press
the option colorize and press ok.
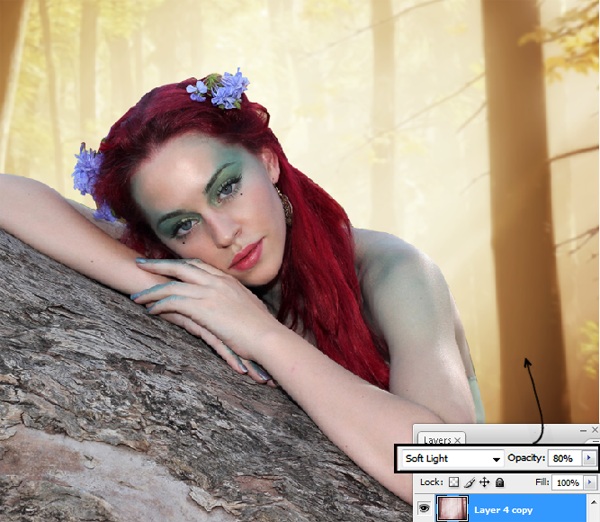
Step 10 – Change layer mode
Now change the layer mode to Soft light. And reduce the opacity to 80%.
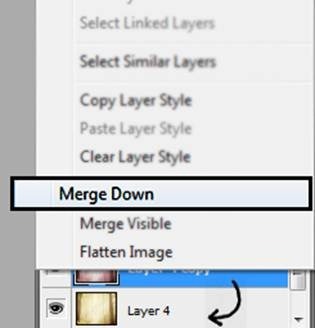
Step 11 – Merge layers.
To
merge layers together, press right click in the layer and choose the
option merge down. In this way you are only going to have one layer of
the background.
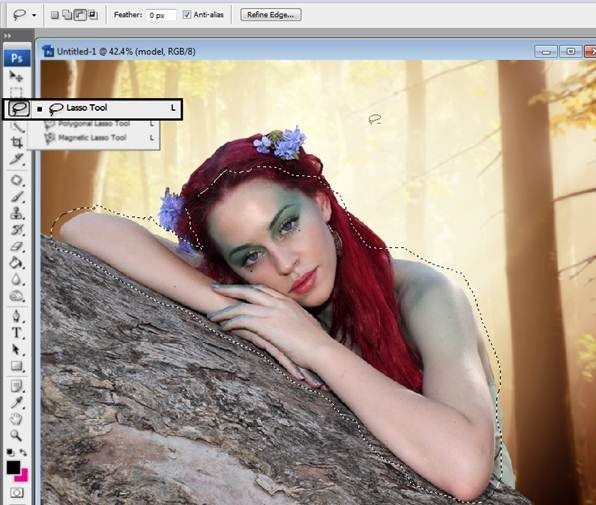
Step 12 – Model’s Skin
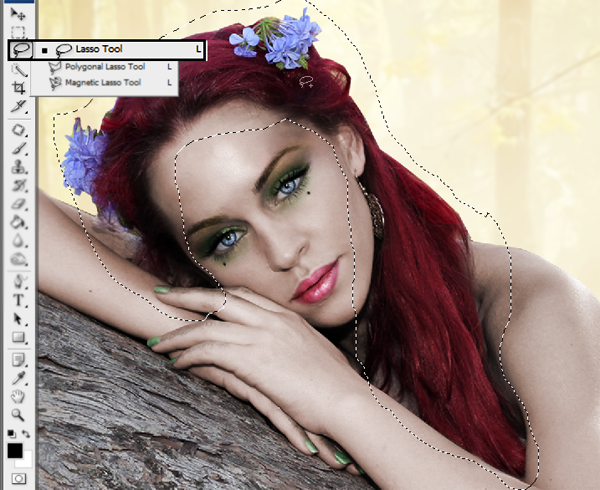
Select model’s skin with the lasso tool. After you finish the selection press Ctrl+J to duplicate the selection.
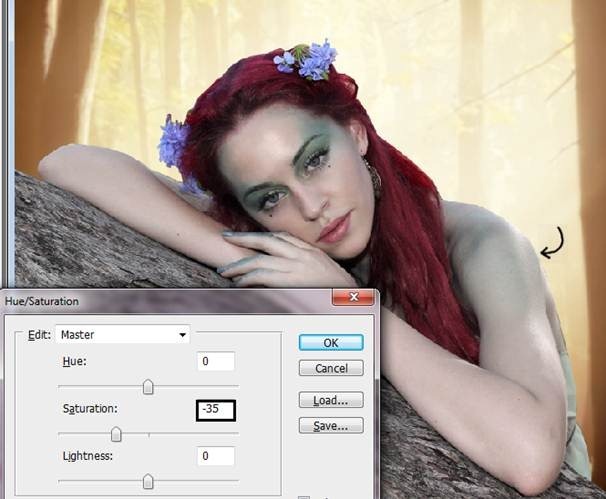
Step 13- Reduce Saturation.
Go to Image – Adjustments – Hue/Saturation (Ctrl +U) and in the option Saturation put -35, press ok to save the changes.
Step 14- More Contrast
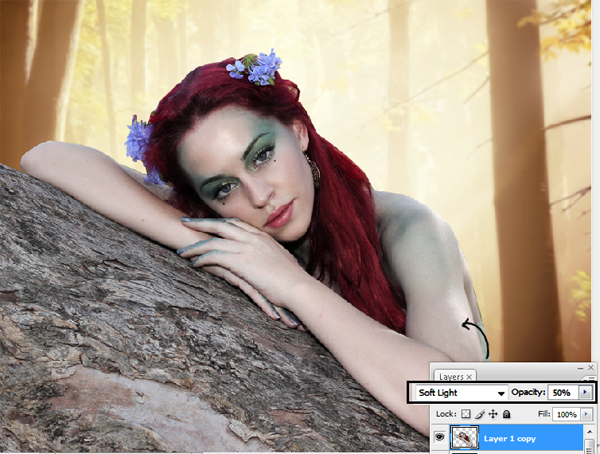
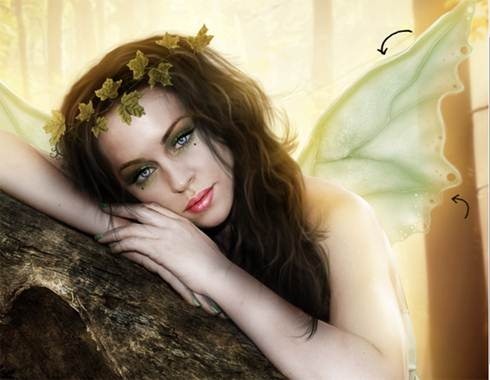
Duplicate that layer and change the layer mode to Soft light and reduce the opacity to 50%.
Step 15- Merge the layer
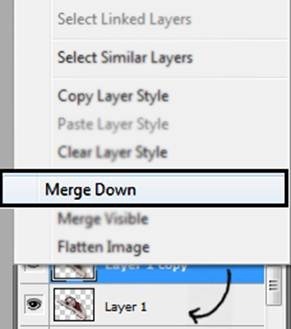
Right click over the layer and choose the option merge down.
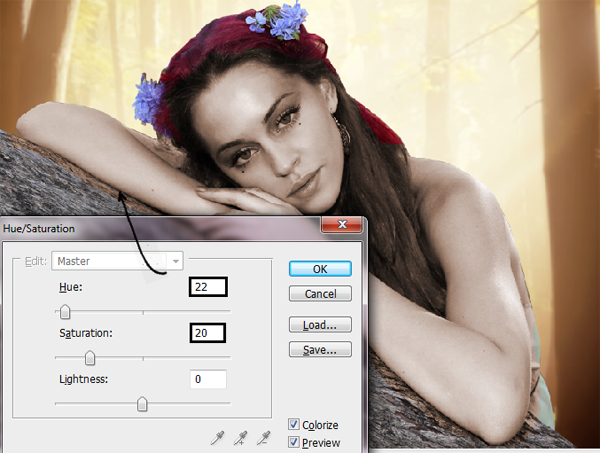
Step 16 – Change skin color.
Duplicate
the model’s skin layer pressing Ctrl + J. Then go to Image –
Adjustments – Hue/Saturation or press Ctrl + U. Press the option
colorize and in Hue put: 22 and in saturation 20.
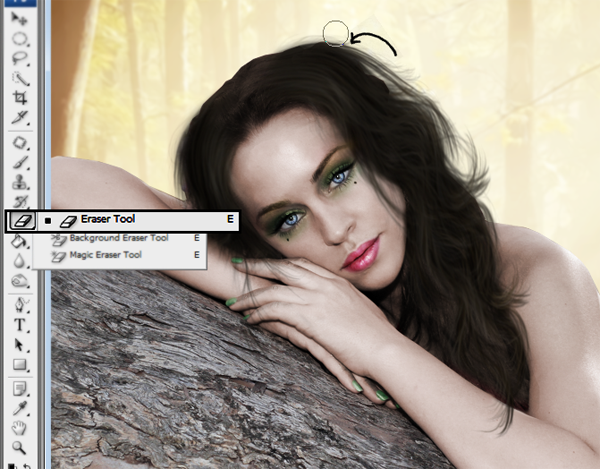
Step 17- Eraser
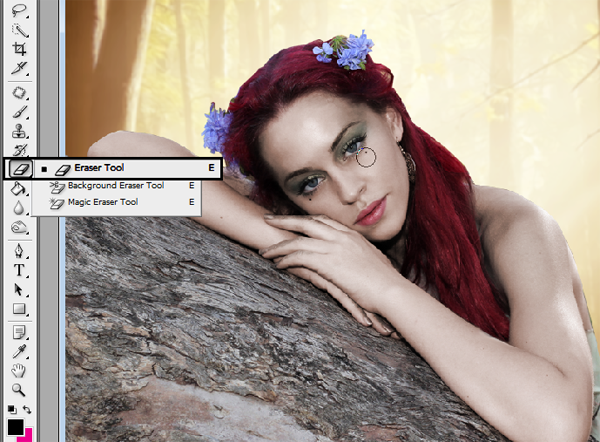
Use the eraser over the model’s eyes lips and hair.
Step 18- Nails
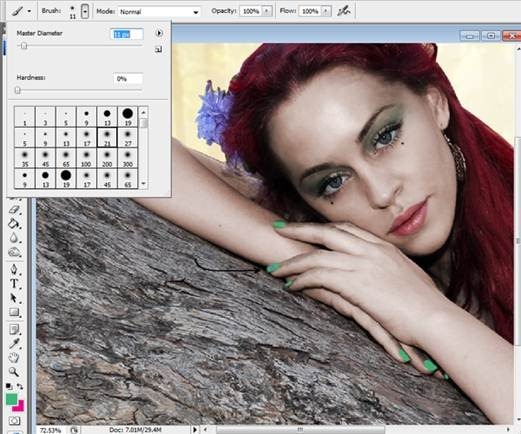
Make a new layer Shift +Ctrl + N, and paint over the model’s nails with a soft round brush in a green tone.
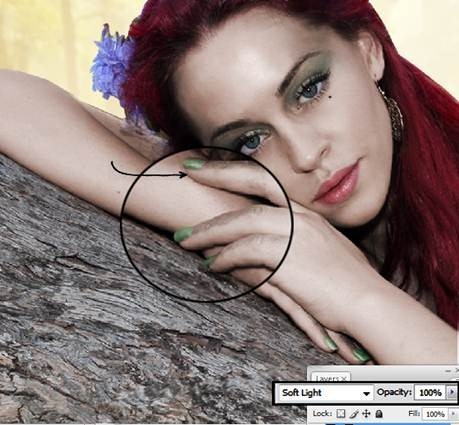
Step 19- change layer mode
Use the layer in soft light mode
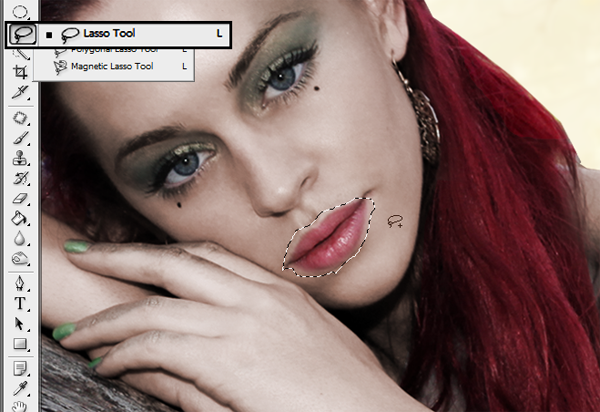
Step 20- Make up
To
make the lips, you have to go to the model’s original layer select the
lips with the lasso tool, then press Ctrl+J to duplicate the selection.
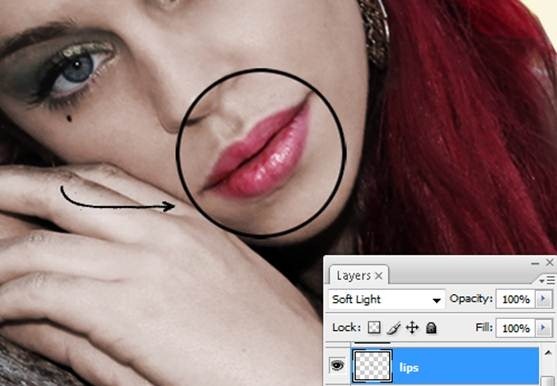
Step 21 change layer mode
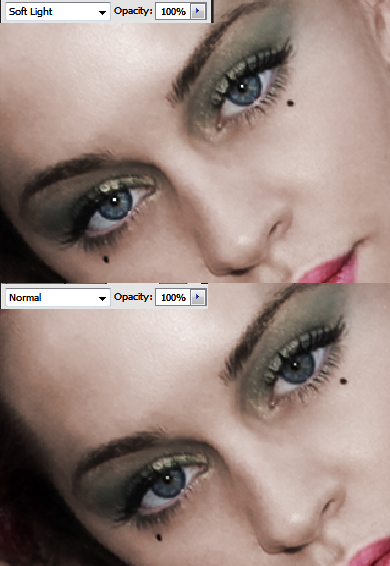
Use layer in soft light and pass eraser in the edges of the lips to get a softer look.
Step 22- Eyes
Go
to model’s original layer and select the eyes with the lasso tool, then
use the layer in color “dodge” mode to make eyes brighter.
Step 23- Brighter
Now duplicate that layer pressing Ctrl + J to get brighter eyes. Remember that the layer has to be in Color dodge mode.
Step 24- Eye shadows
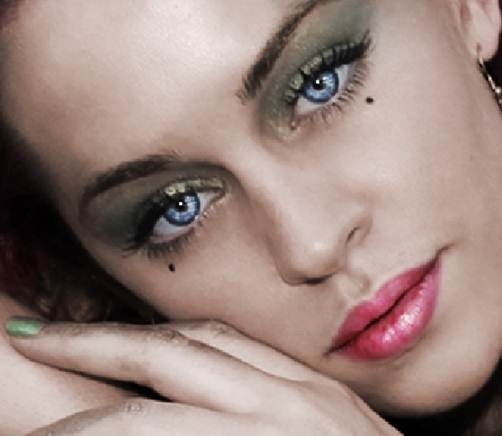
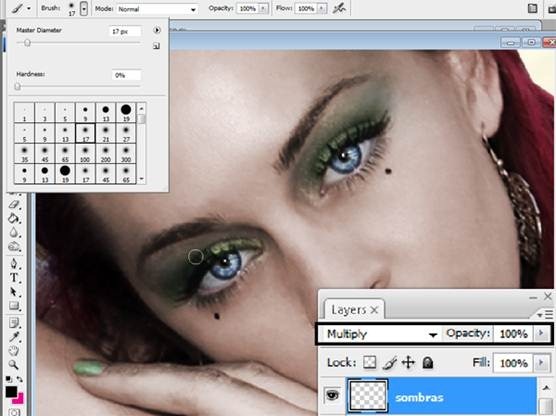
In a new layer paint over model’s eyelid with a soft round brush with a green tone. Use the layer in multiply mode.
Step 25 – More eye shadows
Repeat
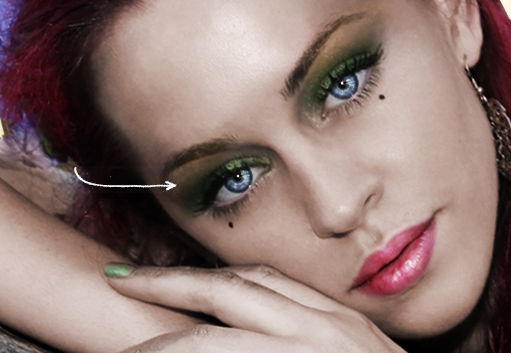
the process several times using different green and orange tones all
over the model eyelids. You can use a brighter color near to the eyebrow
and a darker in the middle of the eyelid.
Step 26- Eyeliner.
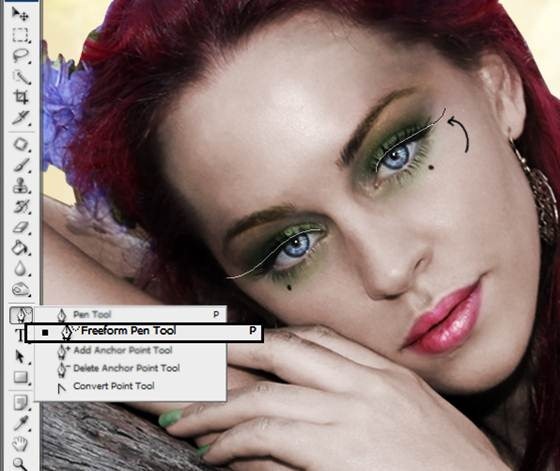
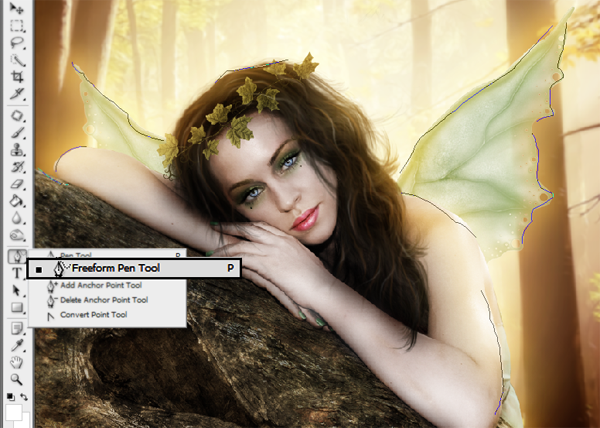
To create a eyeliner effect use the Freeform pen tool and in a new layer (Shift +Ctrl + N) make a stroke near to the eyelashes.
Step 27 – Eyeliner
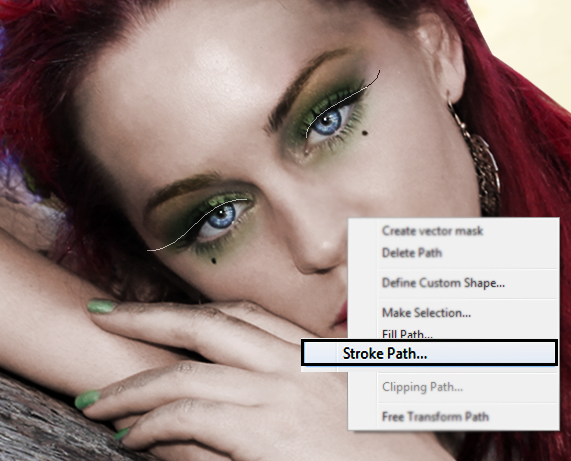
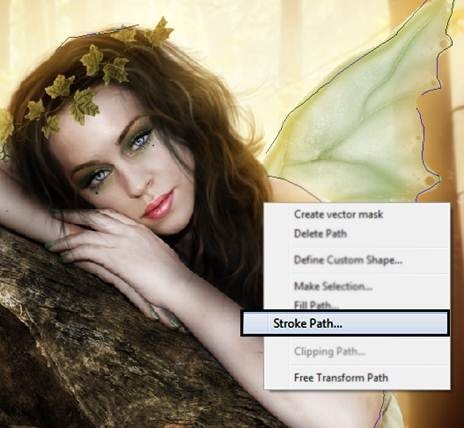
Now press right click and choose the option Stroke Path
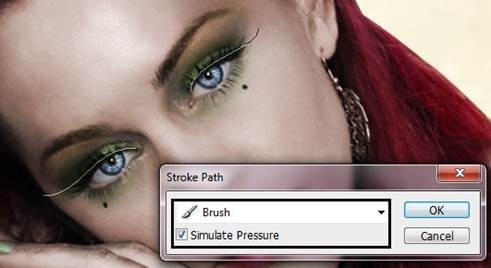
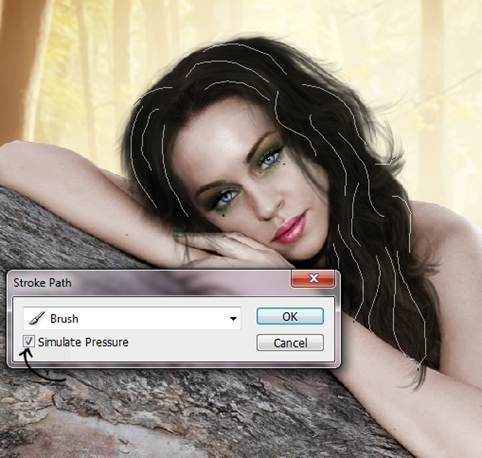
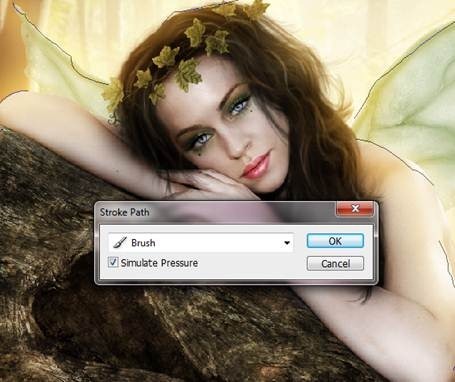
Then make sure to check Simulate Pressure and choose the option brush.
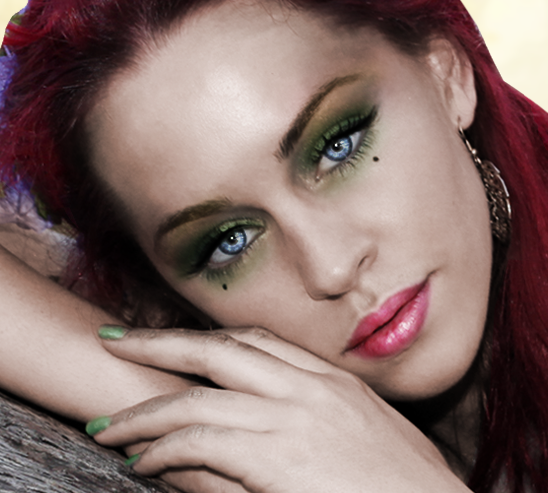
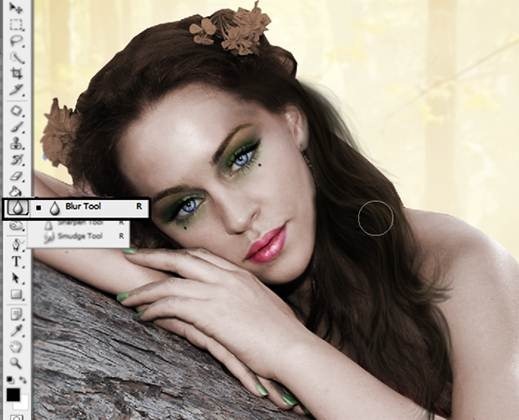
The result is going to be this one. Also if you want to make the strand softer you can pass the blur tool.
Step 28 – Select the hair
To
start with the hair go to the model’s original layer and select the
hair with the lasso tool, then press Ctrl + J to duplicate the
selection.
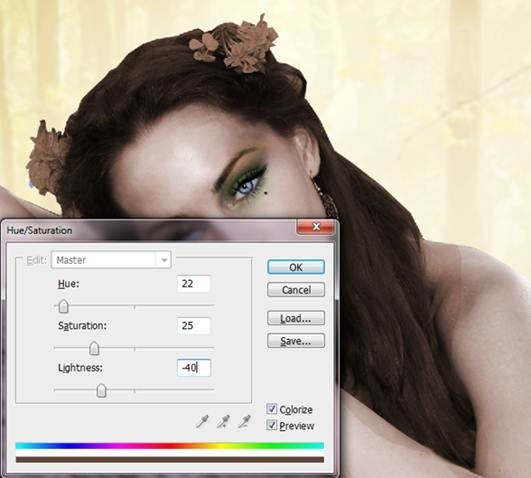
Step 29 – Change hair color.
Go to Image – Adjustments – Hue/Saturation and change the Hue to: 22 Saturation at :25 and Lightness to: -40
Step 30 – Hair strands
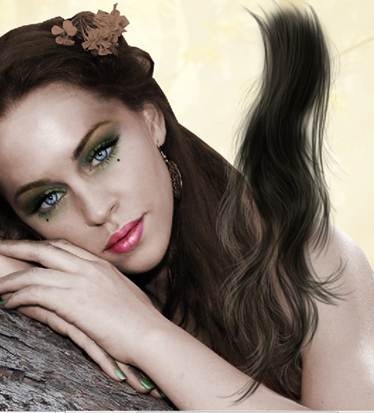
Pick a pre-made hair strand and make sure the color fits with the model’s hair. Then press Ctrl + T to change the size.
To change the shape give right click and choose the option warp.
After you fix the size and shape you can pass some blur over the hair to give a natural look.
Step 31 – More hair
Repeat the process several times. Until you get something like this:
Step 32 More Hair
Now you have to erase the undesired parts.
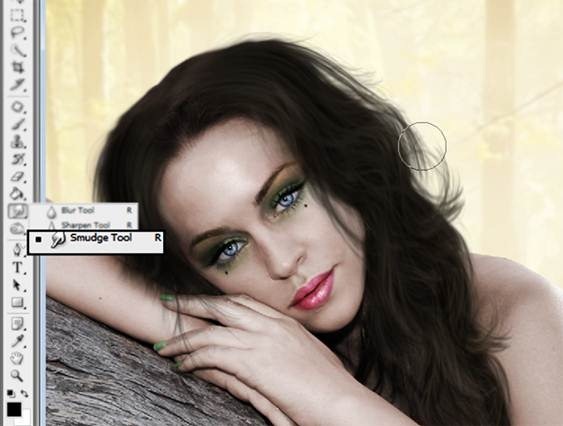
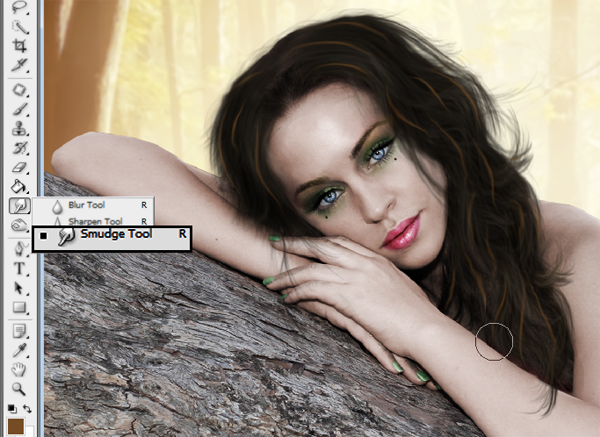
Step 33 – Smudge tool
Use the smudge tool to make the outline of the hair softer. Don’t worry if it looks blurry.
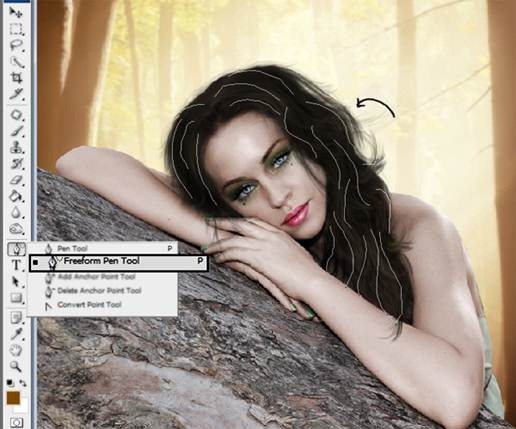
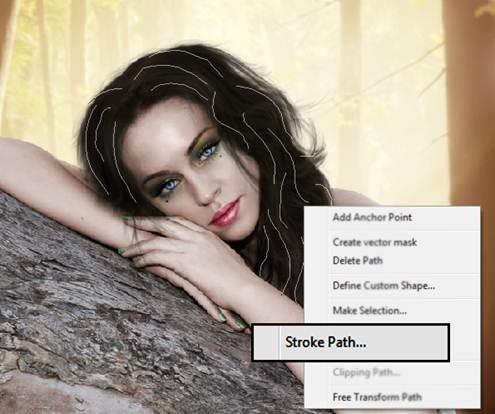
Step 34 – Freeform Pen tool
To
create reflections in the model hair use the freeform pen tool. Create a
new layer and make the strokes where you want the reflections to be.
Step 35 – Stroke
Then press right click and choose the option Stroke Path.
Now choose the option Simulate Pressure “brush”.
Step 36 – Blending the strokes
Pass the Smudge tool over the strokes to give a natural look.
Step 37 – Add more strokes
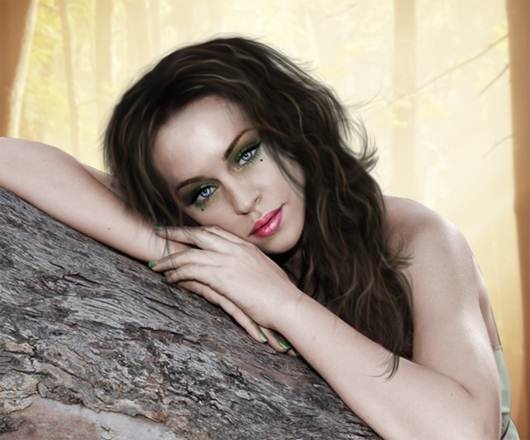
Repeat the process with different tones until you get this result.
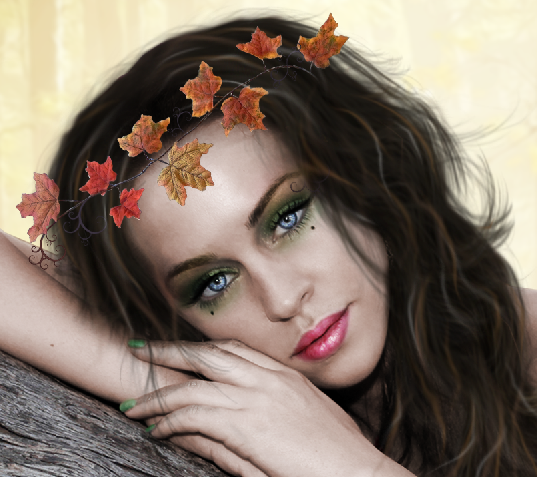
Step 38 – Leaves
Add some leaves to the hair.
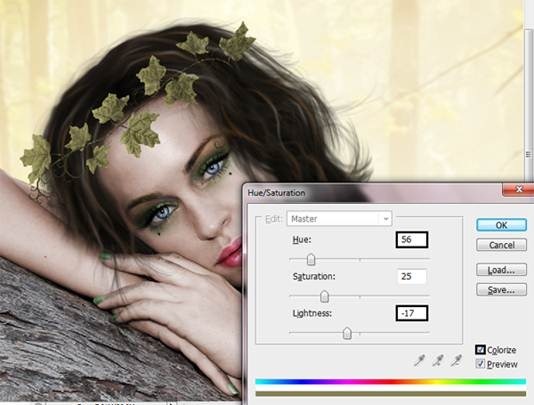
Step 39 – Change Color
Go to Image – Adjustments – Hue/Saturation (Ctrl + U), In hue put: 56 and in Lightness put: -17.
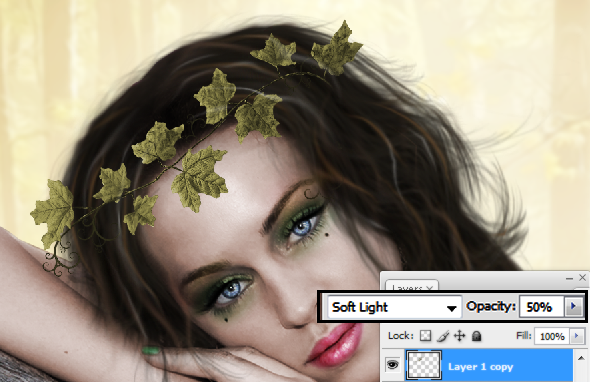
Step 40 Duplicate
Duplicate the leaves layer and change the mode to Soft light, also reduce the opacity to 50%
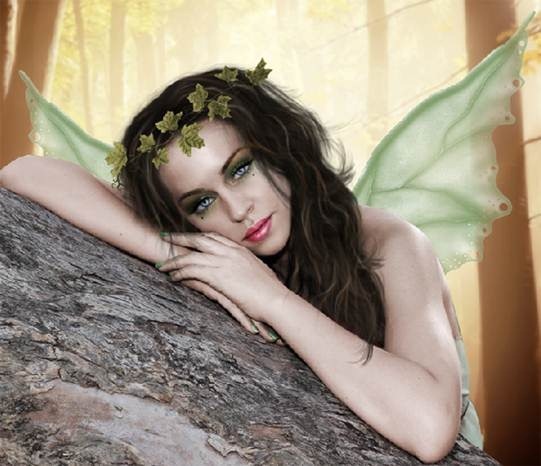
Step 41 – Wings
Add
wings to the model and pass the eraser with a 30% of opacity in the
wings to make them a little more transparent. You also can change the
color of the wings pressing Ctrl + U.
Step 42 – Light
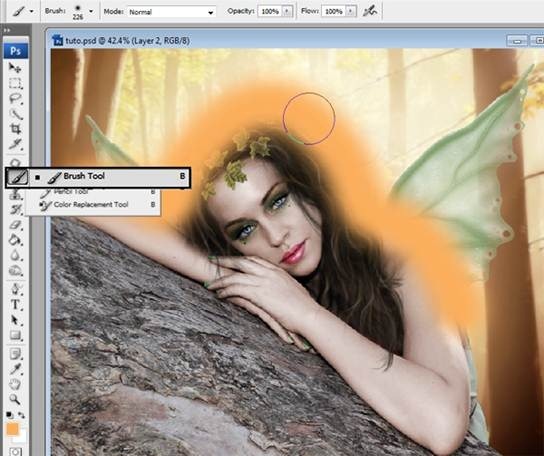
To start with the lighting in a new layer use a soft round brush and pass around the model. Use a soft orange tone.
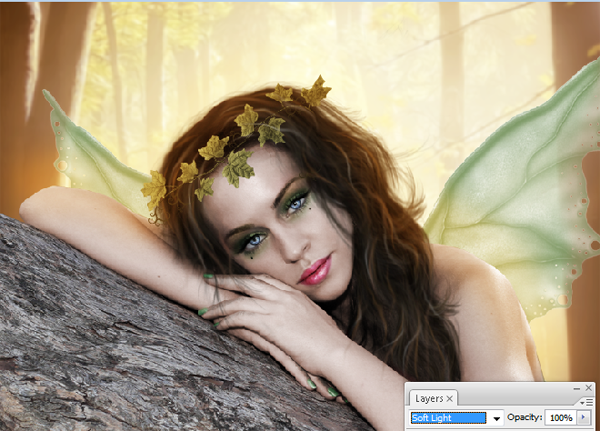
Step 43 – Change layer Mode
Change layer to soft light mode.
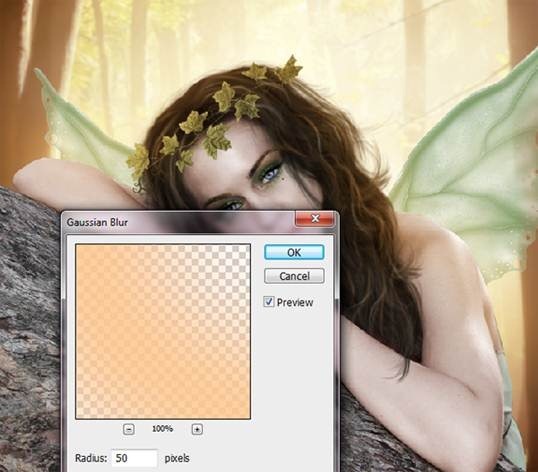
Step 44 – Blur
Use some Gaussian blur. Go to Filter – Blur – Gaussian Blur. And in radius put 50.
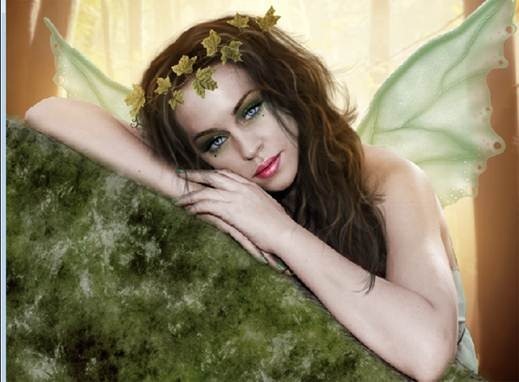
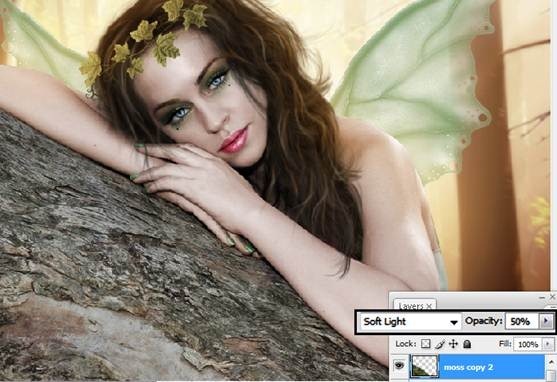
Step 45 – Moss
Add some moss texture to the tree. Erase the undesired parts.
Step 46 – Change layer mode
Use the layer in soft light mode and change the opacity to 50%
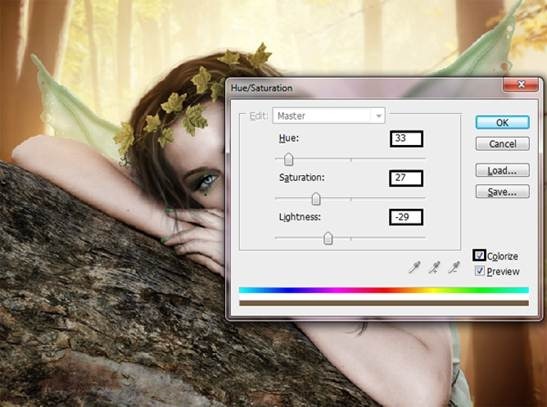
Step 47 – Duplicate
Duplicate
the moss layer and change opacity to 90% and change the color press
Ctrl + U. in hue put: 33 in saturation: 27 and in lightness -29.
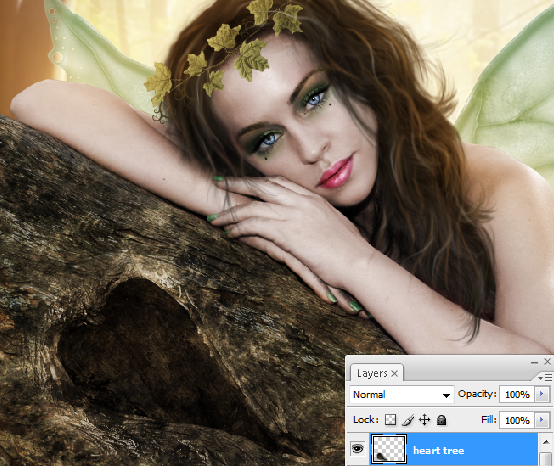
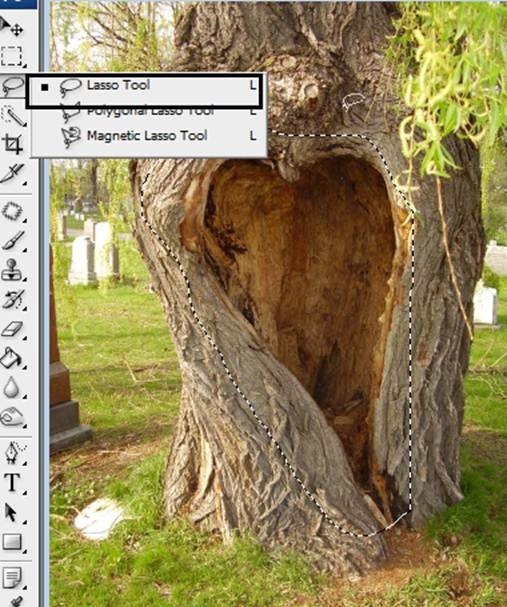
Step 48- Heart
Cut the heart from a tree with the lasso tool.
Step 49 – Heart in the tree
Put
the heart in the tree, to change the position of the heart use free
transform (ctrl + T). Also if is necessary reduce the light from the
tree to fit the color with ctrl+u option Lightness.
Step 51 – More light.
In a new layer pass a soft round yellow
brush and like you did before add Gaussian blur. Go to filter – Blur –
Gaussian Blur. And add 50 of radius. Also Use the layer in soft light
mode.
Step 52 – Lights and shadows.
Repeat the process to make more lights and shadows.
Step 53 – Strokes
Make some strokes with the Freeform Pen tool
Step 54 – Stroke Path
Give right click and choose the option stroke path.
Then choose the option simulate pressure, brush.
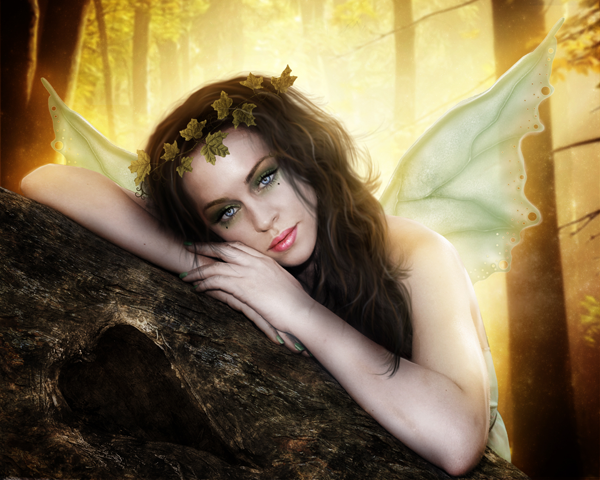
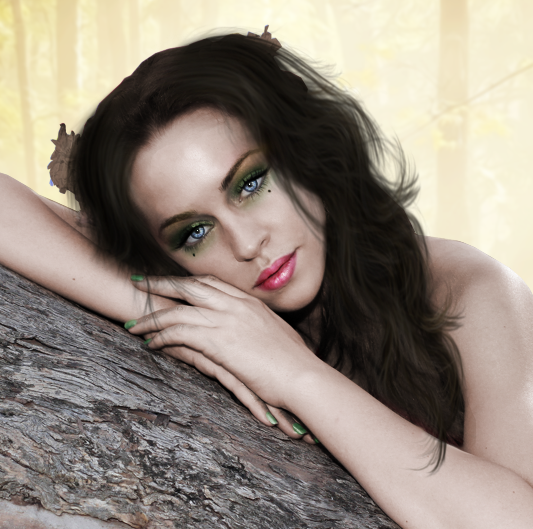
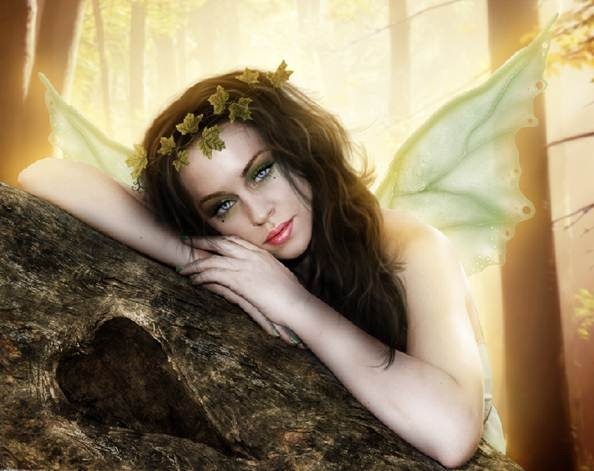
Final Result:
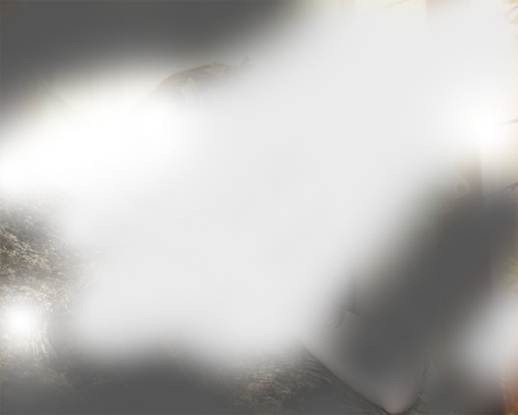
Step 55 – light effect
To make light more intense in a new layer paint with a soft brush like this:
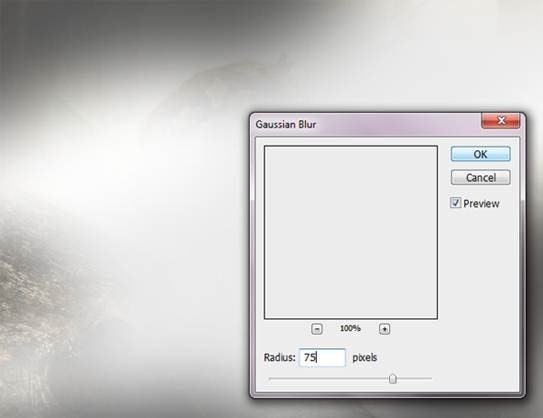
Step 56 – Add Blur
Go to Filter – Blur – Gaussian Blur. And use 75 of radius.
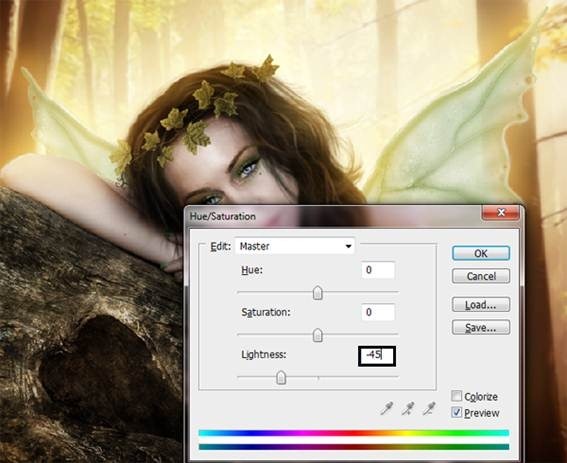
Step 57 – change layer mode.
Put
layer in soft light mode and also if the light is to bright you can
reduce the light pressing Ctrl+ U and in the option lightness put: – 45.
Step 58 – Background texture
Add a magic texture to the background.
Step 59 – soft light.
Change layer mode to Soft light to get the fairy dust effect.
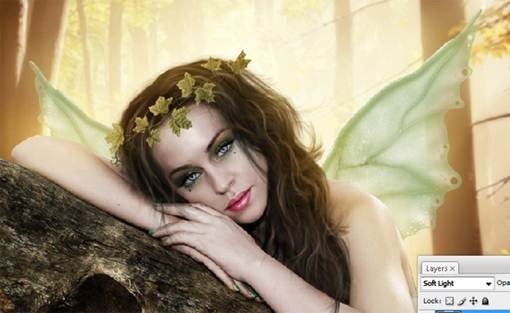
Final Results




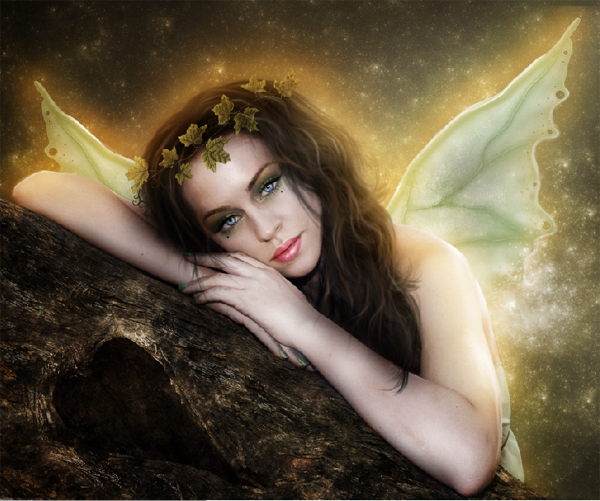
![image002[1] image002[1]](http://photoshoptutorials.ws/images/stories/6bbedf83d3f4_10771/image0021.png)
Tidak ada komentar:
Posting Komentar